Wednesday, October 24, 2012

Bubble Cake

BuBbLe CaKe!

 
This cake was so fun! We called it the bubble cake. It defiantly had its challenges for me as well though. I think I was just having an off day because I have to re make my fondant several times. It was just not coming out right. There were also more seams to cover than I usually ever have… But once the fondant started to work right it was smoothing sailing.
This is what I used for the tag and #1
 
 
I first made the #1 and the name tag out of gum paste a couple days ahead of time so it had plenty of time to harden. I cut the name tag with a decorative rolling cutter and I just eyeballed the design. I used one of my gum paste tools that had a star like shape at the tip and made small impressions to create the stars on the tag. I thinly rolled gum paste that I had colored and made the letters. I got the letters to stick by using a tiny bit of water. (The shinny is the water and once it was dry that was not visible any more) I rolled gum past to make the #1 as well. I also took a paint brush and got the #1 damp and covered it in edible shimmer dust to make it sparkly.


This is what I used for the white cake.
 
 
First layers done, second layers about to go in the oven! They I froze them!
 
The next day I made the filling and frosted the cake. This is what I used to make a raspberry filling… I have since made a different raspberry filling that I liked better. This one had too many seeds for my liking.
 
 Butter Cream!
 
 Putting the filling in before covering with butter cream
 
Covered in butter cream
 
 
Making the fondant.
 
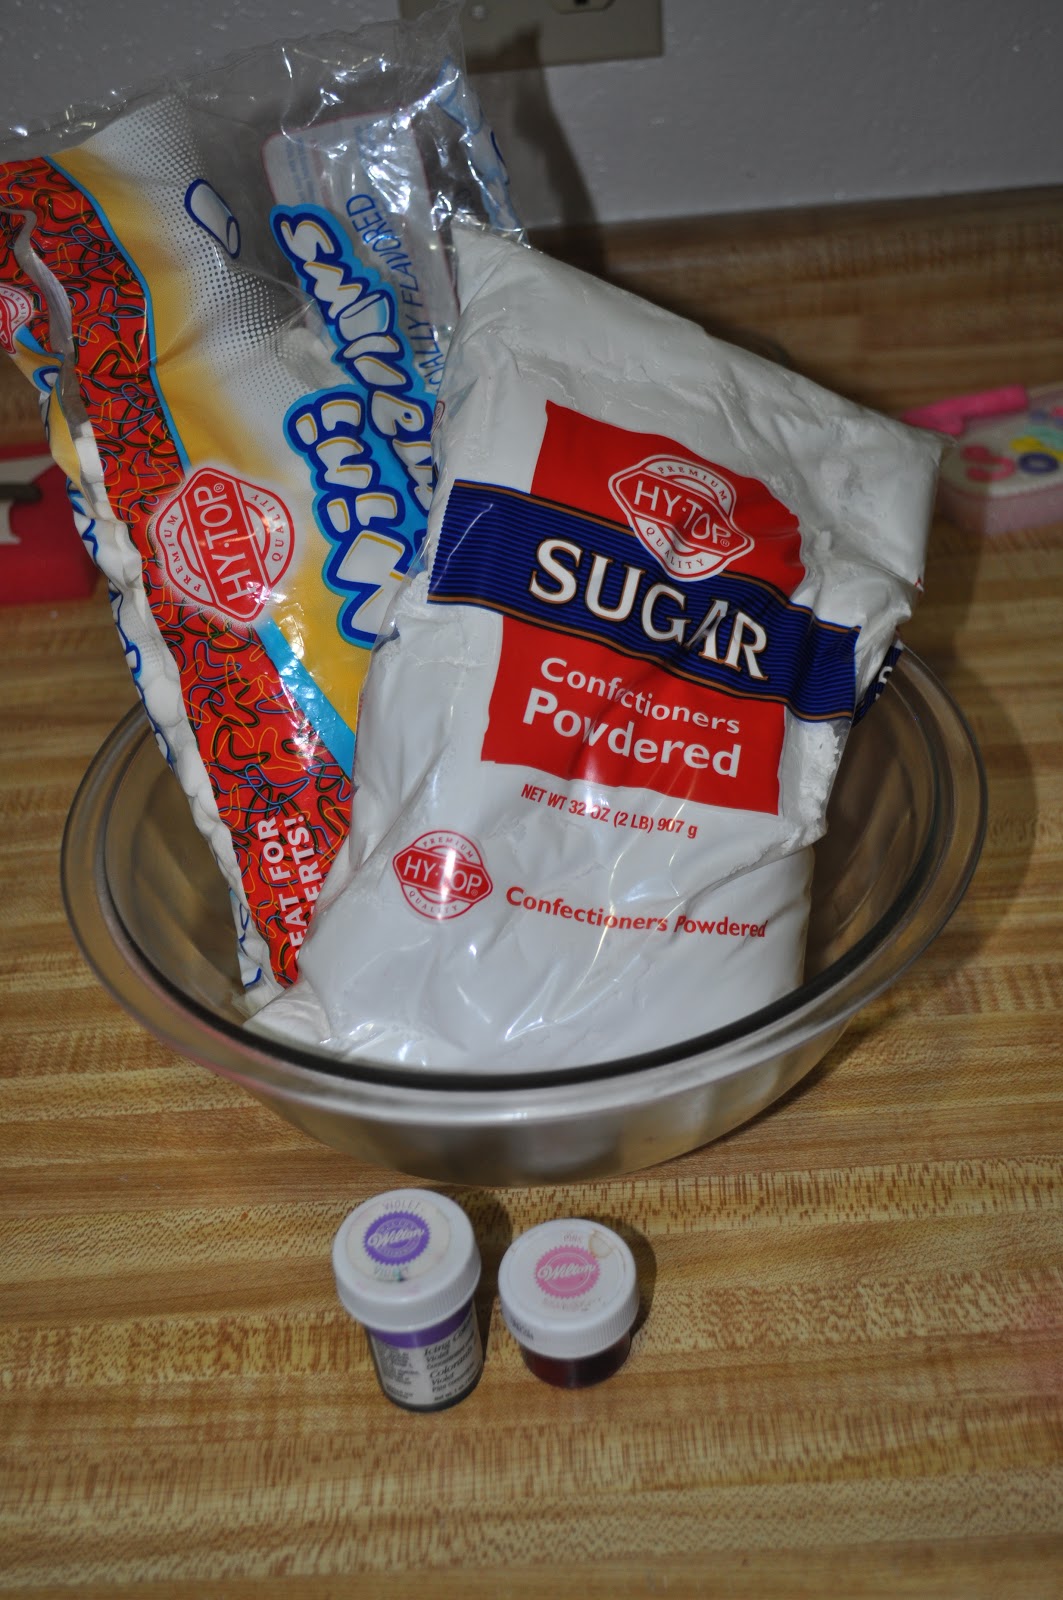
Marshmallows and water after 1 min in the microwave. Then mix it and it gets smooth. Add the powder sugar and mix until you can need it. This is what it looks like after kneading it.


 Add Color
 Roll and cover cakes!
 
At this point i was having fondant issues so I forgot to take more pictures! So this is the finished product. I made lots and lots of balls and put them all over. I held a few in with toothpicks if they did not what to stay. I also cut stripes, decorative strives and polka dots!


Tuesday, October 16, 2012

Pirate cake!


What was used

I made the boat out of um paste and let it harden for 2 days. I had to redo the stick piece ones and ended up making it round instead of flat because the flat one broke.  


4 cups marshmallows with enough water tossed in it to make it slightly moist. Microwave on high for 1 min


Stir until smooth

Add 4 cups of powder sugar and fold in until it starts to get doughy. Rub your hands with shortening and kneed the dough in the bowl until its looks sort of like the picture below. Then kneed it on a surface that has been covered In shortening until its smooth.


Add food coloring and kneed it in. This particular batch of fondant was a little sticky so I put some powder sugar on top so I could cut it without it sticking to my pizza cutter.


Once the stripes were places on the cake I just rubbed them and the powder sugar goes away (see the second picture with the clean stripe?)


I took a picture I had printed and taped it to a zip lock bag. Then I just traced it by piping the lines. If I messed up I just wiped it off and started over. Then freeze for 10 mins and it will peel off and you can set it on the cake!


I used a circle cutter to make a black circle for the skull to go on.
 
 
I make the water with some blue fondant and just “winged” it. It was trial and error and I re did it several times.


Monday, October 15, 2012

Littler Learners

 Carsyn and the Kitchen


Meet my daughter Carsyn. She love to help in the kitchen. No matter what I am doing in from cleaning to cooking and baking she wants to be involved. I recently did a video interview of her when she turned 3 and I asked her what her favorite thing to do was and she told me, “Cook in the kitchen with mommy!” Man did this make me proud!
I have had a few people tell me that there kitchens were too small to get crafty in. Well I have to show my kitchen. It is the smallest kitchen that I personally have ever seen. We live in a tiny 2 bed room town house and the kitchen is super small. But we make it work! We also use out table sometimes but not usually because it would be a pain to clean up my cake stuff for each meal/snack that my daughter has! When I do things like cup cakes I have to use the table though because I can fit all he cup cakes on the counter!

Tuesday, October 9, 2012

Butterflies for my beautiful Daughter

Butterflies!

My daughter has been telling me for months that she wants a butterfly birthday, with a butterfly cake and STAR candles. She has been telling me all of this for at least 3 months. So oh course it was important that I make her just what she was asking for on her special day!
I first made the butterflies wings out of store bought gum paste. I colored it to make different colors and left them on a cook sheet so they would be hard by the time I needed them on the cake. I made these on Wednesday.
 
I also baked to cakes on Wednesday. I over fill my pans so that I can cut to top off and get a nice flat surface using the cake pan as a guide.

 
Then I wrap them really well while they are still slightly warm. ( this keeps the moisture in the cake!) and then freeze them.

 
The ingredients for the butter cream + vanilla, I forgot that for the picture!


Once the cake was frozen (I did this the next day on Thursday) I put butter cream in between the layers and all over the sides to prepare it for the fondant. I also put 3 pieces of tin foil inter the cake in a triangular shape. Once I am done frosting the cake I remove the tin foil to have nice clean edges.

 
This is what we used for the Fondant
I flatten it out some and then roll it to the size I need. I use the silicone rolling mat so that I can flip it on to the cake with out have to handle it. It also helps keep it from sticking to surfaces like the counter. I still put shortening on to the surface of the mat.


Then smooth and trim the fondant as needed. Sometimes I get a seem in the back but I just try and hide it with decoration.
Repeat everything for the top layer!
When I pipe I just use zip lock bags. I like the way they handle better than a pastry bag.

I  made grass!


To add the butterflies I just made a cut into the fondant and slipped the butterfly wing in. I did have to use tooth picks on a couple to keep them in place. Then I piped a yellow body and added some yellow flowers and her name!